
Set up your Silarius Gateway and add cameras
Start the Silarius Gateway, find your cameras, and add them to Silarius Cloud.
By the end your Silarius Gateway will be running and your cameras will be in Silarius Cloud. You will also be able to reach the gateway from anywhere.
What you need
- Your Silarius Gateway, its power supply and a network cable
- A computer on the same network as the gateway and cameras
- Cameras with ONVIF turned on and an ONVIF user set up
- Your Silarius Cloud Admin sign-in
Change the default gateway password right after setup.
Step by step
- Plug in the gateway
Connect the network cable and the power. Wait about 5 minutes for the gateway to start.
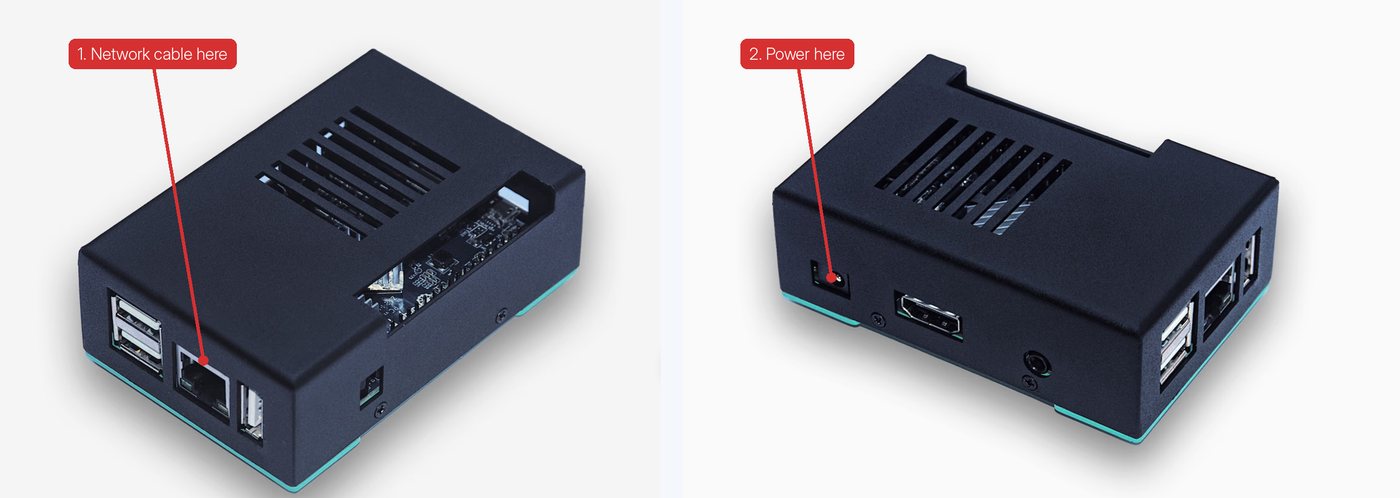
- Open the gateway's page
On a computer on the same network, open a web browser. Type camera-gateway.local in the address bar. You will see the gateway's sign-in page.
- Sign in
Ask Silarius support for the default user name and password. Change the password right after you sign in.
- Can't find the page?
Use a network scanner app to find the gateway's local IP address. Type that address in your browser instead. If you still can't find it after 5 minutes, unplug the gateway, plug it back in and try again in 2 to 5 minutes.
- Find your cameras
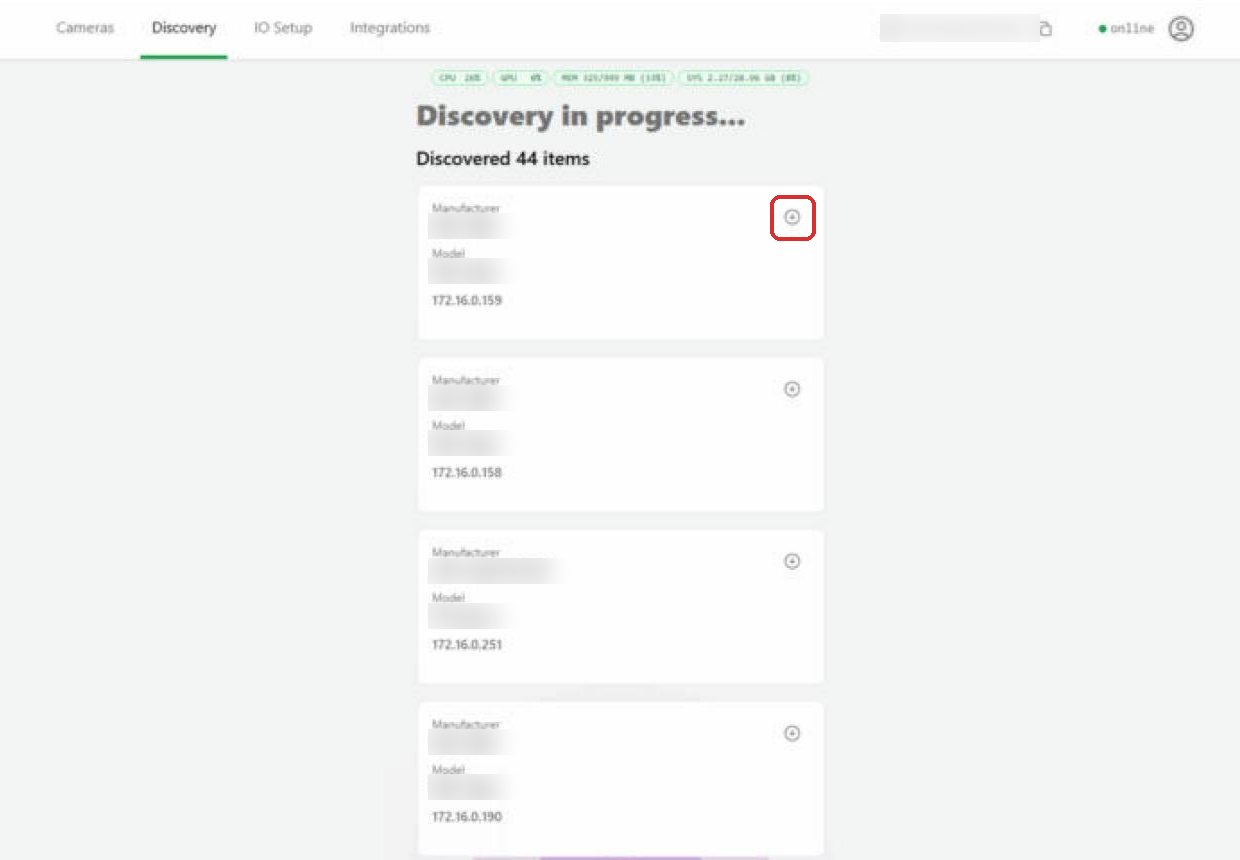
Click the Discovery tab. Click the plus button next to each camera you want to add.
- Add a camera by hand if needed
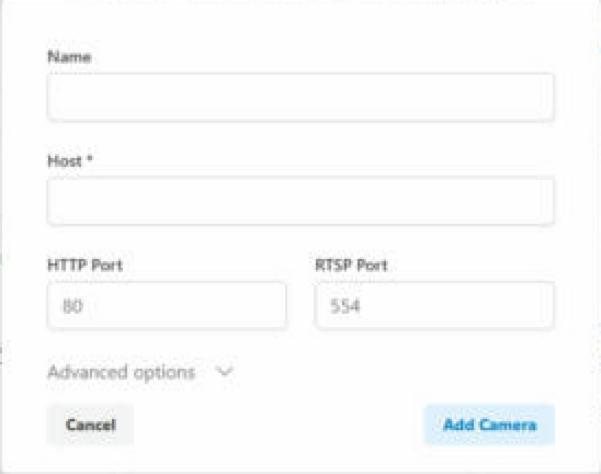
If a camera doesn't show up, click Add Camera. Enter the camera's local IP address and ports, then click Add Camera at the bottom.
- Copy the registration codes
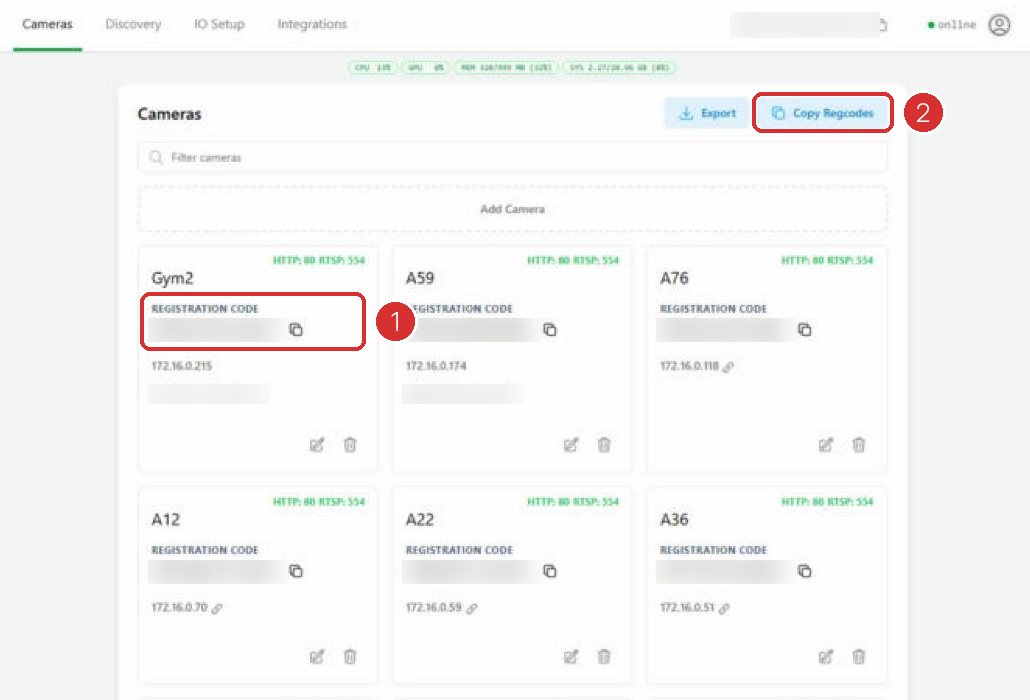
Go back to the Cameras tab. Each camera now has its own registration code. Copy All copies every code in the order you added them.
- Log in to Silarius Cloud Admin
Go to silariussecurity.com/login and click Log in to Silarius Cloud. Log in to Silarius Cloud Admin and go to the Cameras menu.
- Add the camera
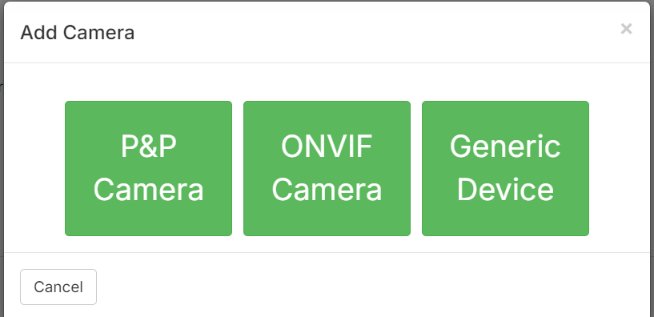
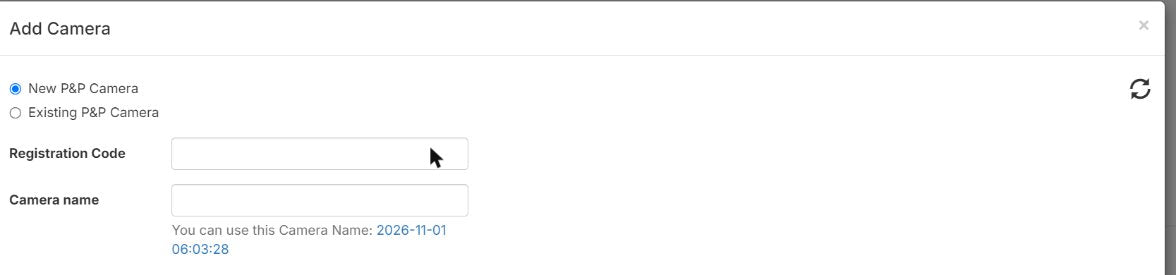
Click Add and choose P&P Camera. Paste the camera's registration code.
- Finish the camera
Give the camera a name (you can change it later). Enter the camera's ONVIF user name and password. Pick the plan for the camera and click Create.
- Optional: reach the gateway from anywhere
Add the gateway's own registration code as a P&P Camera too. Then open it and use Generate URL on the Troubleshooting tab. You get a short-lived link to the gateway's page from anywhere.
- Disable the gateway entry
After you add the gateway as a P&P camera, disable it. That way it is not counted as a camera. A disabled entry still lets you make the remote link.
Cameras that don't speak ONVIF
You can add a non-ONVIF camera by hand with Add Camera. It will stream video. But AI analytics won't work, because the camera doesn't send event data. Adding it through the gateway does not make it ONVIF.
Adding the same camera more than once
When you add a camera with the ONVIF method, you can switch to using the Registration Code instead of a web address. A plus: you can add the same camera more than once by reusing its code.
Good to know
- For discovery to work, cameras need ONVIF turned on and the firewall must allow multicast traffic for the gateway.
- If a camera won't appear in Discovery, check that its ONVIF user is turned on.
Still stuck? We'll do it with you, free.
Silarius customers can get free remote help: sign in, click one button, and a Silarius technician joins your computer.