
Add a Silarius X camera (plug and play)
Connect a Silarius X camera straight to Silarius Cloud with no recorder and no gateway.
By the end your Silarius X camera will be sending video to Silarius Cloud, with no recorder, no gateway and no port forwarding.
What you need
- A Silarius X camera
- A network cable to your router or network switch, with internet
- A computer on the same network, to open the camera's own web page
- The camera's username and password
- An owner or admin sign-in for Silarius Cloud Admin
Step by step
- Plug in the camera
Plug the camera into your network so it can reach the internet. Give it a minute to start.
- Open the camera's own web page
On a computer on the same network, type the camera's IP address (its number on your network, like a house number) into a modern web browser. Sign in to the camera.
- Update the firmware only if told to
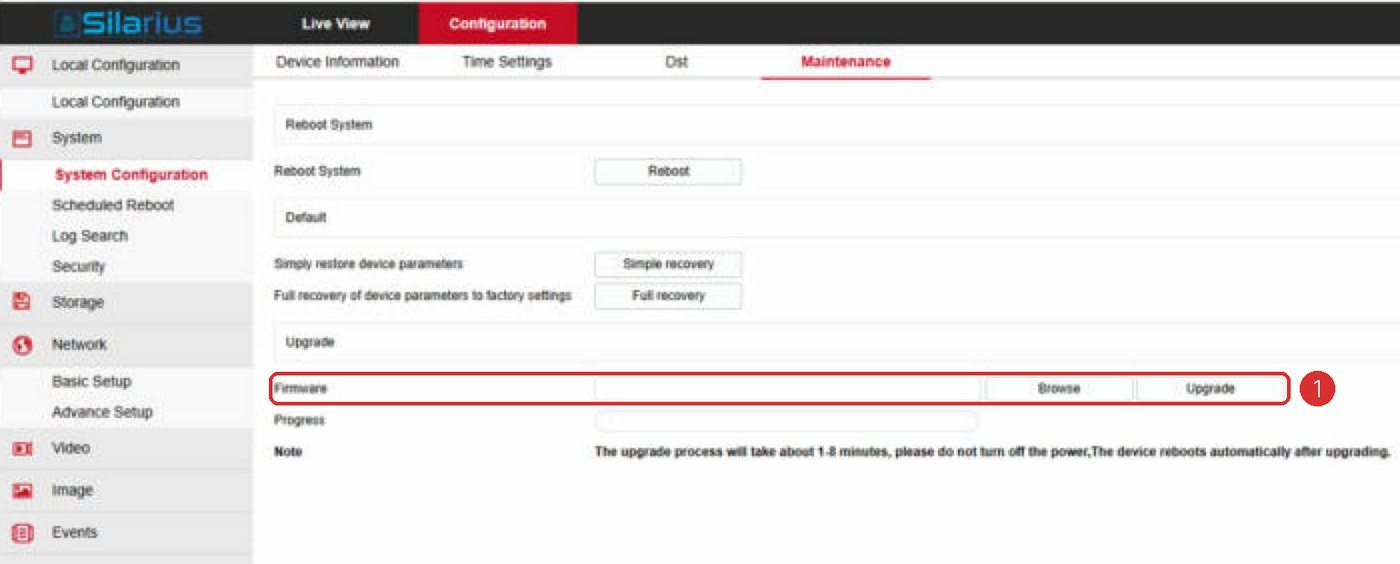
Firmware is the camera's built-in software. If Silarius support asks you to update it, go to Configuration, then Maintenance, then Upgrade. Click the folder button, pick the file, click Upgrade, and wait until it finishes.
- Reset after an update
After a firmware update, it is best to do a full factory reset. In Maintenance, click Reset to Factory Default. Then set a new camera password.
- Check the network settings
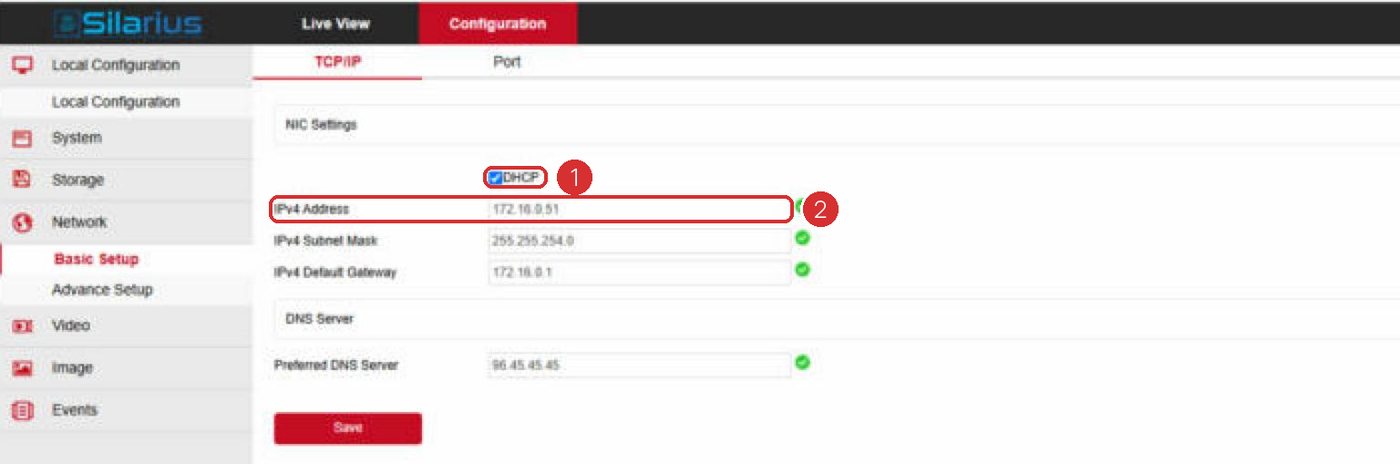
Go to Configuration, then Device, then Local Network. Automatic IP (DHCP) is best. If you use a fixed IP address, check the IP Address, Subnet Mask and Default Gateway. The camera must reach the internet and look up website names (DNS).
- Turn on ONVIF features
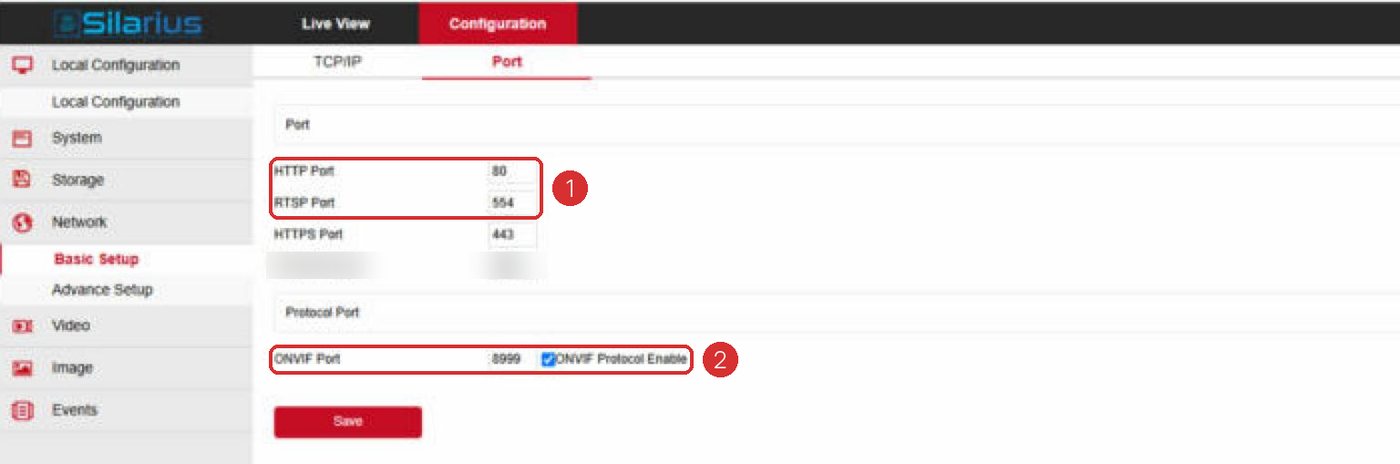
Go to Protocol, then ONVIF Configuration. Turn on ONVIF, Profile G, Media2 and Intelligent Analysis Switch. On some models these are under Network, then CMS.
- Set the clock
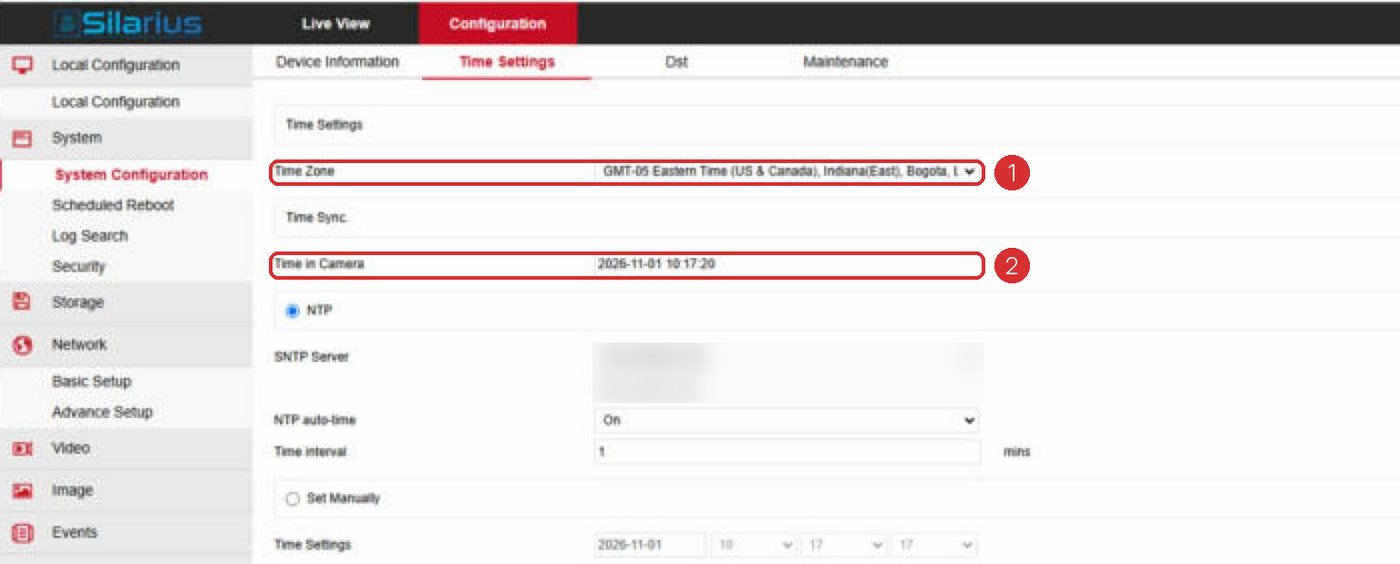
Go to Configuration, then Device, then Date and Time. Set the right time for where the camera is.
- Find the registration code
Open the Device Info page and find the MAC address (the camera's unique hardware ID). To make the registration code, take out the colons and put SNLL in front. Example: MAC address 00:1C:27:1C:7C:93 becomes SNLL001C271C7C93.
- Add the camera in Silarius Cloud Admin
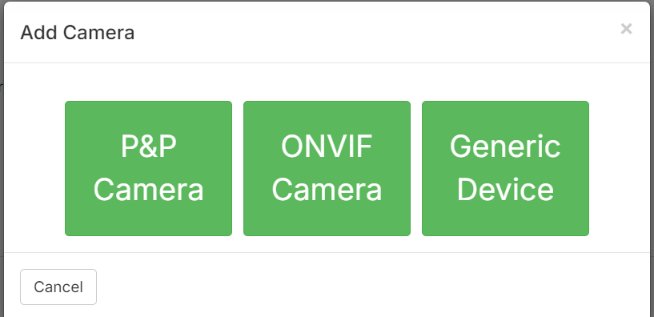
Sign in to Silarius Cloud Admin. Click Cameras, then Add. A window asks how you want to connect.
- Pick plug and play
Choose P&P Camera (plug and play).
- Enter the code and save
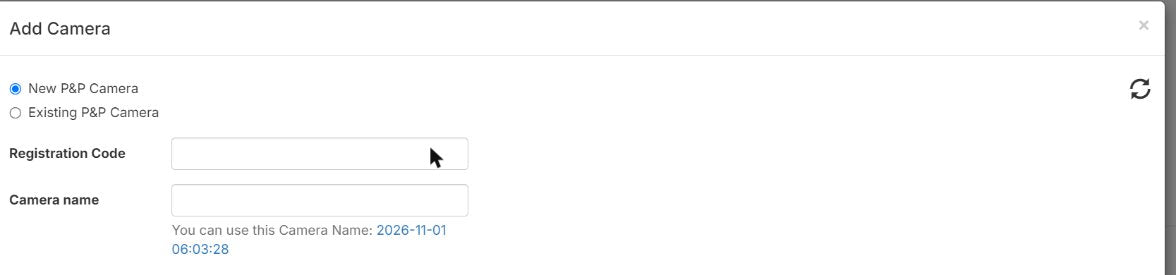
Type the registration code and a name for the camera. Type the camera's username and password if you changed them from the factory ones. If you see a plan choice, pick the one Silarius set up for you. Click Create.
- Check that it connected
The camera now shows in your Cameras list. Once it is online, its status says Connected.
Good to know
- Silarius X cameras keep working if your internet provider changes your address or you move the camera. You don't need to change anything in Silarius Cloud.
- Write down the camera's password, especially after a factory reset. You need it when you add the camera.
Common questions
Do I need to set up port forwarding?
No. Silarius X cameras use an encrypted tunnel over port 443. No ports need to be opened.
It says Assigned, Not Initialized. Is that bad?
No. It means the camera was added but has not come online yet. It changes to Connected the first time the camera gets online. See Silarius X camera status.
Which plan should I choose?
Contact Silarius: request a quote or email us.
Still stuck? We'll do it with you, free.
Silarius customers can get free remote help: sign in, click one button, and a Silarius technician joins your computer.