
A quick tour of the Silarius Cloud web app
Learn what every menu and button in the web app does, so you always know where to click.
By the end you will know the five main parts of the Silarius Cloud web app. You will know what each menu and button is for, and how to move menus around the screen.
What you need
- A computer with a modern web browser
- Your Silarius Cloud username and password
Step by step
- Sign in
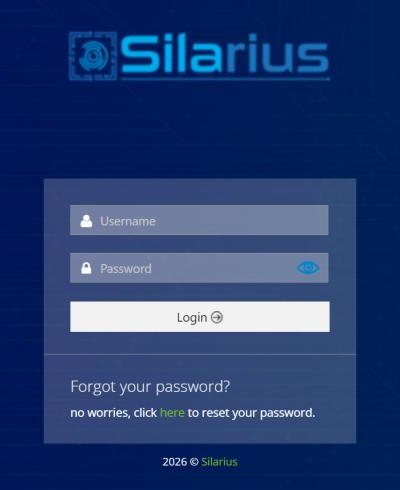
Go to silariussecurity.com/login and click Log in to Silarius Cloud. Type your username and password. The web app opens.
- Look at the five parts
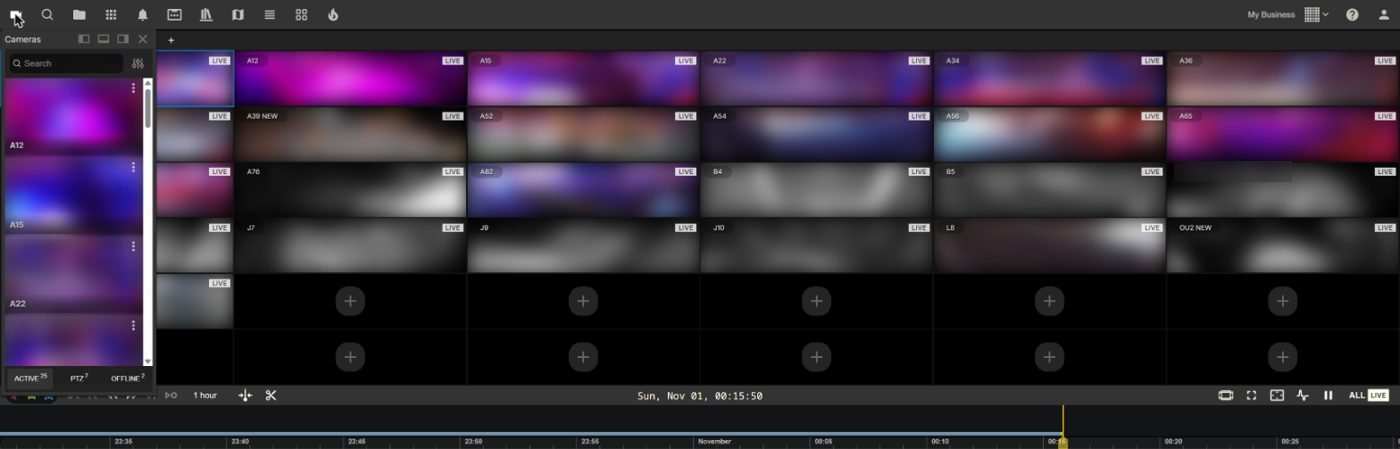
The screen has five parts. The top menu bar, the camera toolbar, the bottom toolbar, the thumbnails and the timeline.
1. The top menu bar
The row of icons at the top opens the main menus. Here is what each one does:
- Cameras: a list of all your cameras. Type a name to find one. Tabs at the bottom show Active (online), PTZ (cameras you can turn and zoom) and Offline cameras.
- Navigation: folders (categories) that keep your layouts and cameras tidy.
- Groups: your saved layouts. You can pick one to open every time you sign in.
- Layout: pick how many camera boxes show on the screen, and save the result.
- Events: things your cameras noticed, like motion or a person. You can filter them.
- Library: your saved clips and timelapses. You can find, rename, download and delete them.
- Map: shows where your cameras are on a map.
- AutoScan: makes the screen switch between layouts or cameras by itself.
- Thumbnail grid: small pictures from recorded video, so you can spot a moment fast.
- Heatmap: colors that show where the most activity happens. It only shows if a camera has object detection (the system spotting people, cars and other things) turned on.
- Help: short video lessons and a printable guide.
- Profile: change your password, open Silarius Cloud Admin (if you are an owner or admin), and sign out safely.
2. The camera toolbar
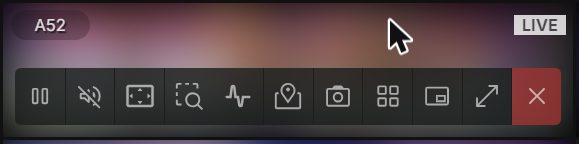
Move your mouse over a camera picture. A small toolbar appears. You only see the buttons that the camera supports.
- Pause / Play: stop or start the video.
- Volume: shows a sound slider. The camera needs a microphone, and sound must be turned on in Silarius Cloud Admin.
- Playback speed: only shows when you watch recorded video. Go from half speed up to 16 times faster.
- Aspect ratio: stretch the picture to fill the box, or keep the camera's true shape.
- Synchronize: makes this camera play the same moment as the main camera. It shows when you have more than one camera on the screen.
- Map: shows where this camera is.
- Snapshot: saves a picture to your computer.
- Thumbnail: opens the thumbnail grid for this camera.
- Area search: search for objects in one part of the picture. Only for cameras with object detection.
- Fullscreen: makes this camera big. The menus stay on the screen.
- PTZ: turn and zoom the camera. Only for PTZ cameras.
- Mic: talk out of the camera's speaker. The camera needs two-way audio, and the mic must be turned on in the camera's settings in Silarius Cloud Admin.
- Close: takes the camera out of its box so you can put a different one there.
3. The bottom toolbar
The bottom toolbar has two sets of buttons.
The first set works on the selected camera (the one with the colored border). It has buttons to jump back or forward to the last object, the last event, or by a set amount of time. It also has the Create clip button and a date and time you can click to open a calendar.
The second set works on all cameras on the screen. You can show or hide thumbnails, make the whole web app full screen, change the aspect ratio for all cameras, sync all cameras, pause all cameras, and send all cameras back to live video.
4. Thumbnails
Thumbnails are small still pictures from the recorded video. They sit just above the timeline. Click one to start playing from that moment. See Find a moment fast with thumbnails.
5. The timeline
The timeline is the blue line at the bottom. It shows the recorded video for the selected camera. Click anywhere on it to watch that time. See Watch recorded video with the timeline.

Move menus where you like
Menus open in panels. A panel is one menu box, like the camera list. You can dock (stick) a panel to the left, right or bottom edge of the screen. You can also undock it so it floats over the video.
- The dock to button sticks a panel to an edge.
- The undock button makes the panel float. Drag a floating panel anywhere and resize it.
- When several panels share the left or right edge, they show as small icons at the bottom of that edge. On the bottom edge they show as names at the top.
- Click an icon or name to switch to that panel.
- The close button closes the whole edge area. An empty edge area closes by itself.
The menu icons at the top also help. Click an icon to open its panel. Click it again to close it.
Good to know
- Press Ctrl + P from any menu to search for a camera or a layout.
- Press Shift and / together to see all keyboard shortcuts.
Common questions
Why don't I see the Heatmap menu or the Area search button?
These only show when at least one camera has object detection turned on. Ask your account owner or admin, or contact Silarius support: get free remote setup help or email us.
Why don't I see the PTZ or Mic buttons?
You only see buttons your camera supports. Your user role (the set of things you are allowed to do) must also allow them.
Still stuck? We'll do it with you, free.
Silarius customers can get free remote help: sign in, click one button, and a Silarius technician joins your computer.