
Add a camera with ONVIF (URL)
Add an ONVIF camera straight to Silarius Cloud using your router's port forwarding.
By the end you will have added an ONVIF camera to Silarius Cloud using its internet address. This way needs router settings, so take it slow.
What you need
- An IP camera that supports ONVIF
- Admin access to the router where the camera is
- The camera's ONVIF username and password
- An owner or admin sign-in for Silarius Cloud Admin
If your internet provider changes your public IP address, every camera that uses it stops sending video. You will need to enter the new address for each one. A DNS name helps avoid this.
Step by step
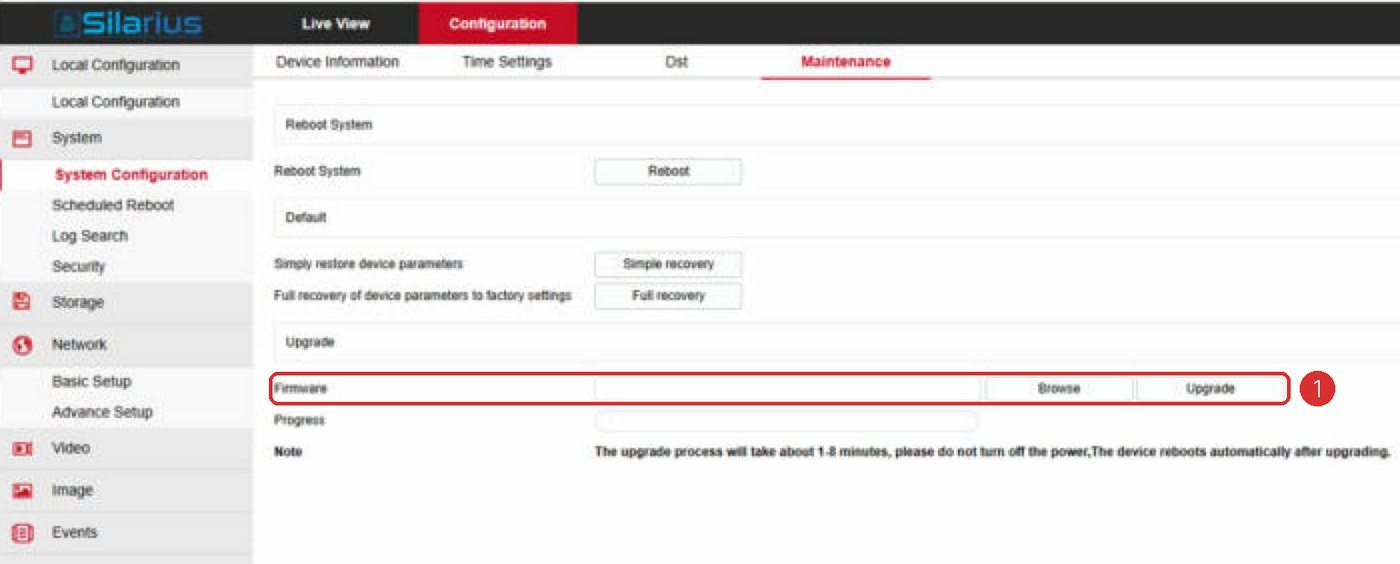
- Update the camera's firmware
Firmware is the camera's built-in software. Install the newest version, following the camera's own instructions.
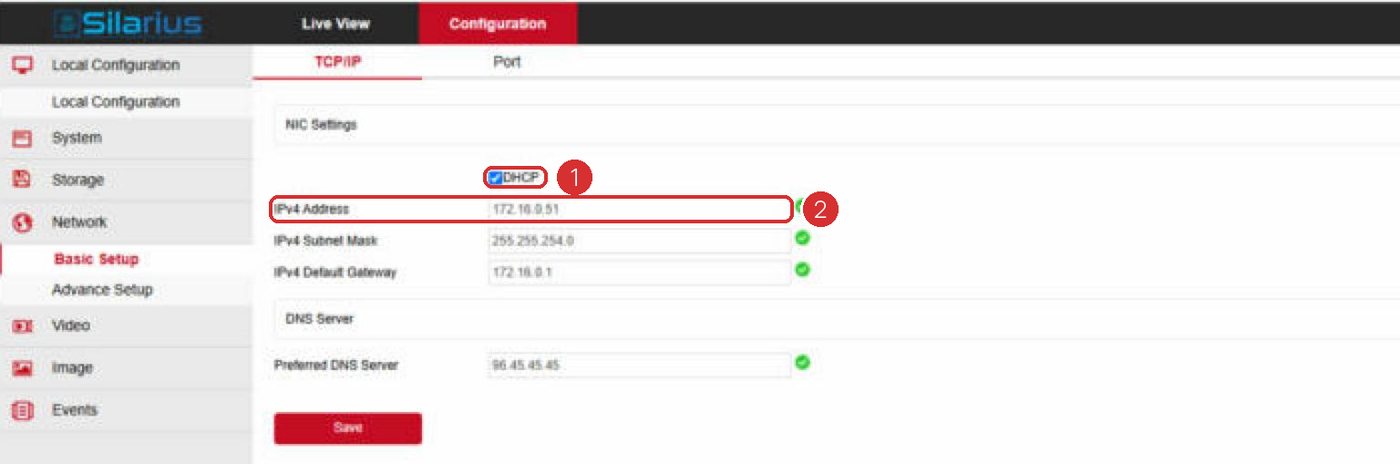
- Give the camera a fixed IP address
On the camera's own web page, set a static IP (a number that never changes). Also set the right gateway and DNS for your network, and check the HTTP and RTSP port numbers. If the IP changes later, your router rule stops working.
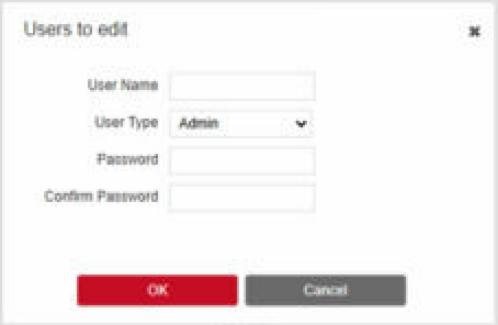
- Set up the ONVIF user
Some cameras need a separate ONVIF user. See Turn on your camera's ONVIF user.
- Open the router's port forwarding page
Sign in to your router as an administrator. Find Port Forwarding. Each router looks a little different.
- Make the RTSP rule
Make a rule. For the public (or external) port, pick any unused number. For the local (or private) port, use the camera's RTSP port, which is usually 554. Pick TCP/UDP (some routers call it Dual). Enter the camera's local IP address.
- Make the HTTP rule
Make a second rule the same way. This time, the local port is the camera's HTTP port, which is usually 80.
- Find your site's public address
A DNS name (a web name that follows your address) is best. If you don't have one, use your site's public IP address. On a computer using the same router, search the web for "what is my IP" and copy the IPv4 address.
- Start adding the camera
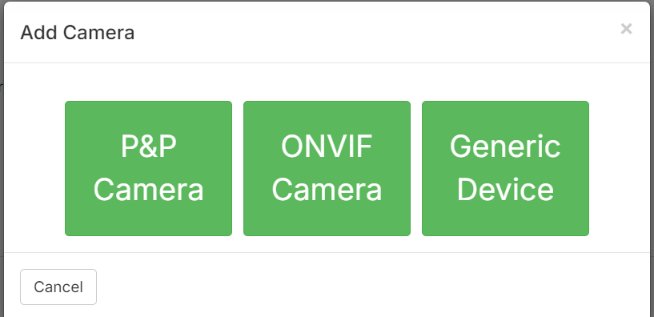
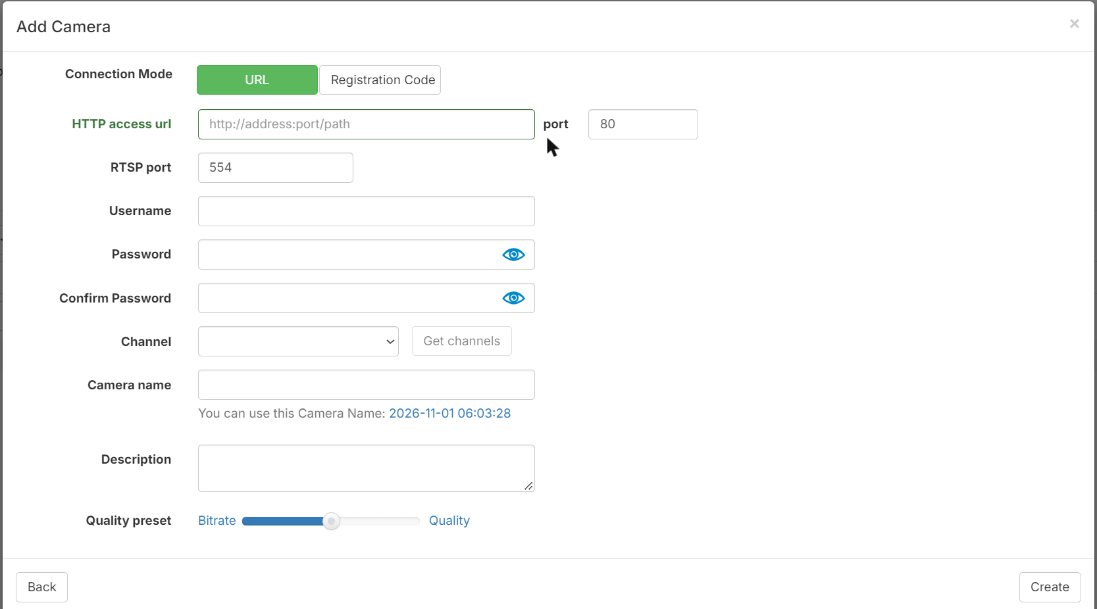
In Silarius Cloud Admin, click Cameras, then Add. Choose ONVIF. For connection mode, choose URL.
- Enter the address and ports
Put your DNS name or public IP in the HTTP access URL line. For the HTTP and RTSP ports, use the public port numbers from your router rules.
- Enter the camera's sign-in
Type the camera's ONVIF username and password. These are often the same as the camera's web page sign-in. If the camera has a separate ONVIF user, use that one.
- Get channels and choose quality
Click Get Channels and pick a video profile from the list. Move the Quality Preset slider to the quality you want. Silarius Cloud sets up the camera to match.
- Create the camera
Click Create. The camera is added to your list.
- Fine-tune if needed
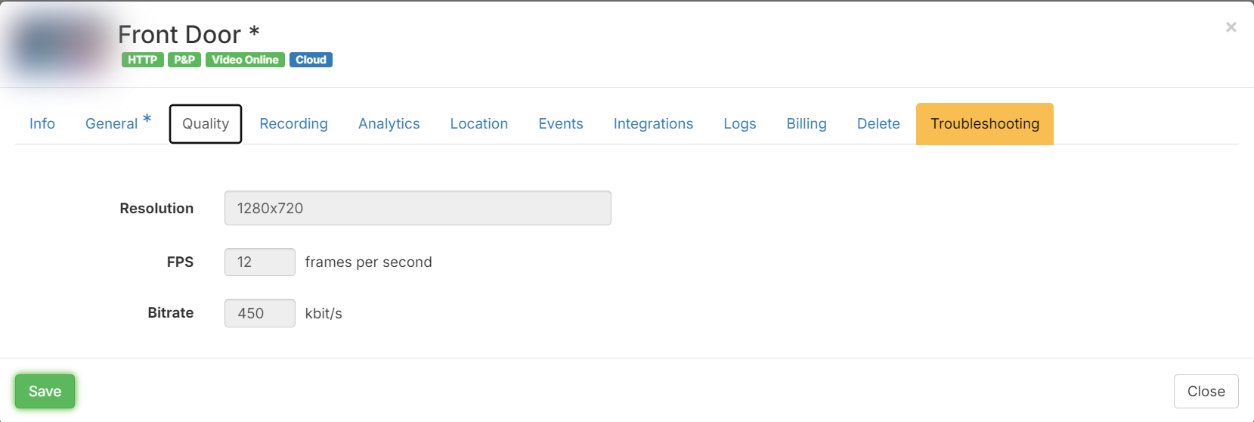
Click the camera name. On the Quality tab you can change the video profile, resolution, image quality and bitrate. On the Recording tab you can change how long video is kept. On the Analytics tab you can set motion, line crossing and smart analytics, if the camera supports them.
Before you start
Port forwarding means opening a door in your router so the cloud can reach the camera. This way relies only on the camera's own security. If you would rather skip router settings, the Silarius Gateway is easier and safer. See Ways to connect your cameras.
Common questions
Can I add my NVR this way?
Use the Silarius Gateway instead. It's the easiest way to add an NVR or DVR. See Connect your NVR or DVR.
The camera says there is an ONVIF problem, but my password is right.
ONVIF may be turned off on the camera. See Turn on your camera's ONVIF user.
Can someone set this up for me?
Yes. Contact Silarius support: get free remote setup help or email us.
Still stuck? We'll do it with you, free.
Silarius customers can get free remote help: sign in, click one button, and a Silarius technician joins your computer.