
Silarius Gateway: from the box to live video (start to finish)
Every step, in order: plug in the Silarius Gateway, add your cameras to it, add them to Silarius Cloud Admin, and watch them in the web app.
By the end, the cameras you already own will show live video in Silarius Cloud. You do it in 5 parts. Take them one at a time.
What you need
- The Silarius Gateway, its power adapter and one network cable
- Your cameras, already working on your network. IP cameras of any make, or an NVR or DVR with cameras on it (see Connect your NVR or DVR)
- Each camera's ONVIF user name and password (ONVIF is the common language cameras use to talk to the Gateway)
- A computer on the same network as the cameras
- Your Silarius Cloud sign-in
Do the parts in order. Each part needs the one before it.
Step by step
- Part 1 · Plug in the Gateway
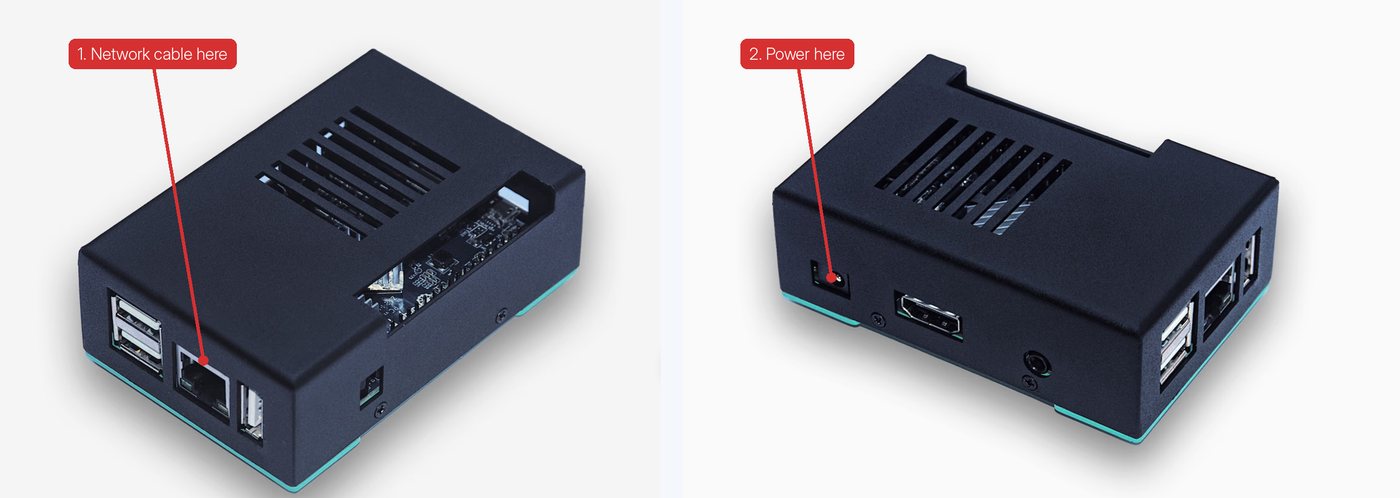
Plug one end of the network cable into the Gateway and the other end into your router or network switch. That is the same network your cameras are on. Then plug in the power.
- Part 1 · Wait 5 minutes
The Gateway needs about 5 minutes to start up the first time. Don't unplug it while you wait.
- Part 1 · Open the Gateway's page
On your computer, open a web browser. In the address bar, type camera-gateway.local and press Enter. The Gateway's sign-in page opens.
- Part 1 · Sign in to the Gateway
Sign in with the Gateway's default user name and password. Don't have them? Ask Silarius support. After you sign in, change the password to your own.
- Part 1 · Page won't open?
Wait 5 more minutes and try again. Still nothing? Unplug the power, plug it back in, and wait 2 to 5 minutes. You can also find the Gateway's address (its IP address, like a house number on your network) with the free Silarius IP Tool and Scanner. Then type that address in the browser instead.
- Part 2 · Find your cameras
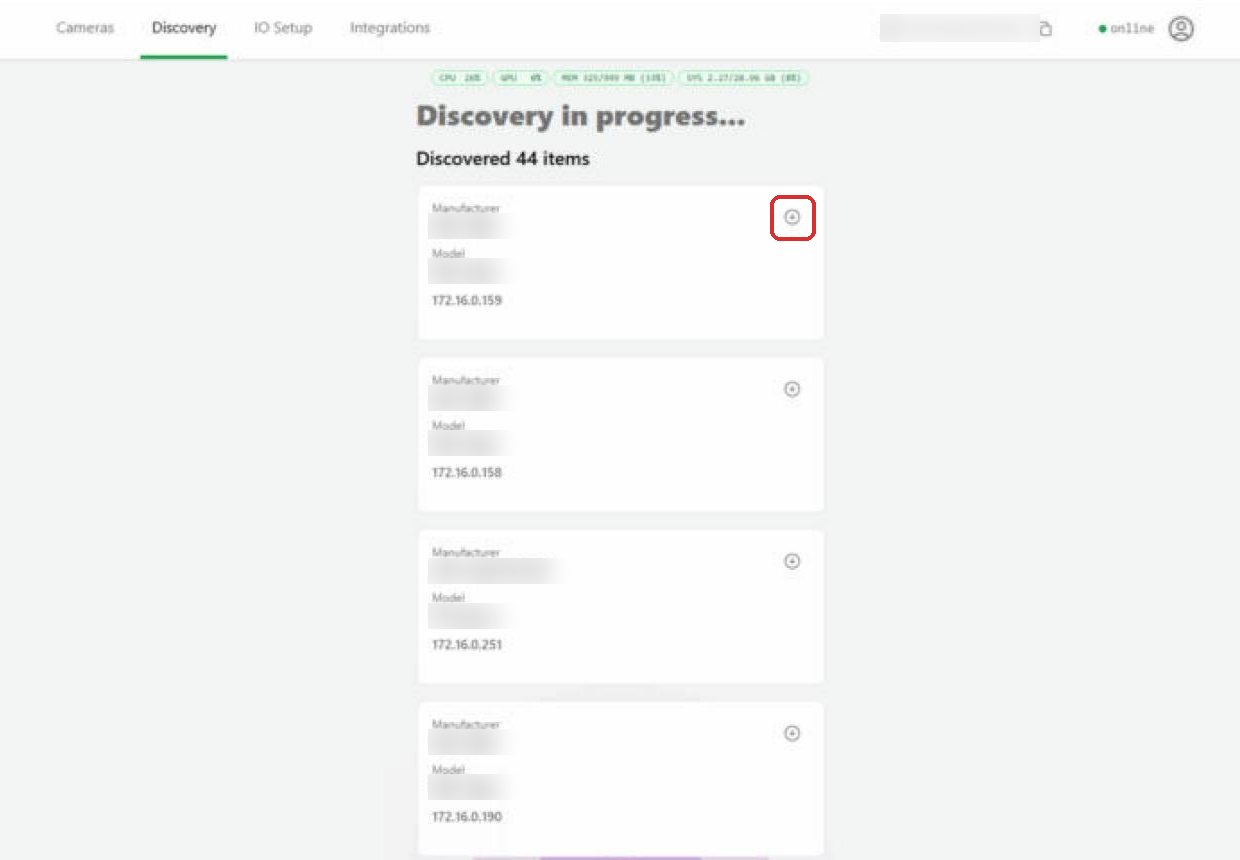
On the Gateway's page, click the Discovery tab. The Gateway looks for cameras on your network and lists them.
- Part 2 · Add each camera
Click the plus (+) button next to each camera you want in Silarius Cloud. The Gateway can hold up to 50 cameras.
- Part 2 · Camera not on the list?
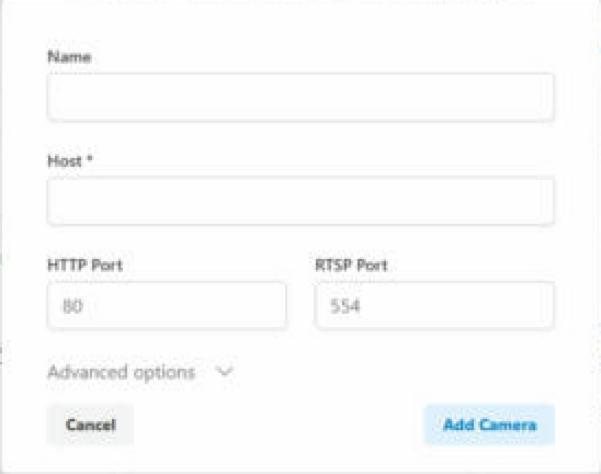
Two things make a camera hide: ONVIF is turned off on the camera, or your network blocks the Gateway's search. Turn ONVIF on in the camera's own settings (see Turn on the camera's ONVIF user). Or add it by hand: click Add Camera, type the camera's IP address and its ports (usually 80 for HTTP and 554 for RTSP), then click Add Camera at the bottom.
- Part 2 · Copy each registration code
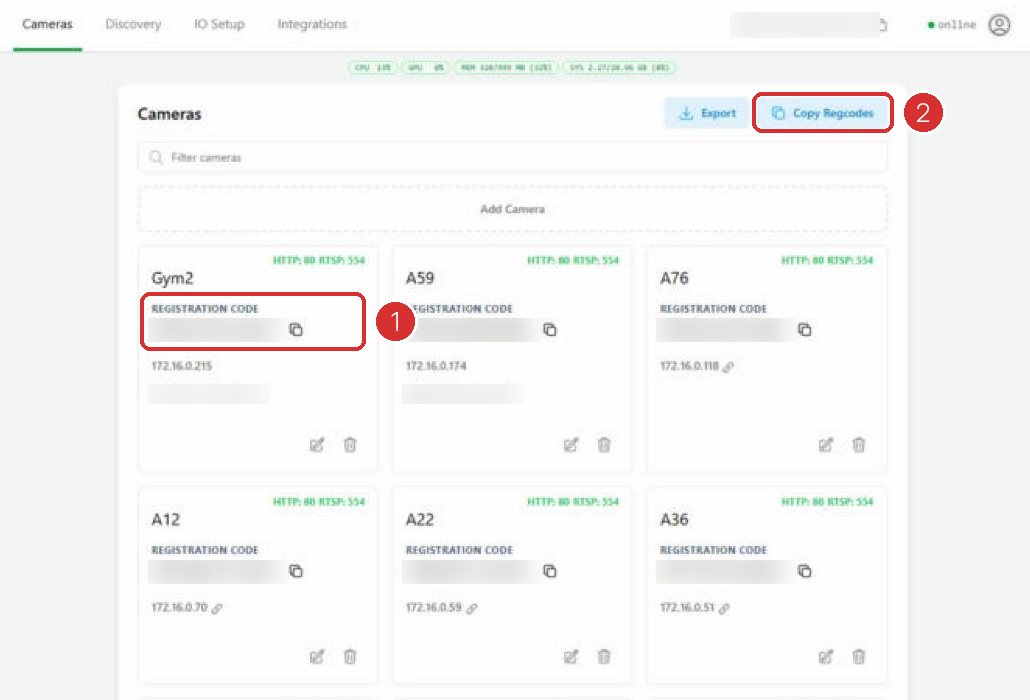
Click the Cameras tab. Every camera now has its own registration code. That code is the camera's ticket into Silarius Cloud. Write the codes down or keep this page open. You need one code for each camera in Part 3.
- Part 3 · Log in to Silarius Cloud Admin
Go to silariussecurity.com/login and sign in to Silarius Cloud Admin. Click Cameras, then the green Add button.
- Part 3 · Pick P&P Camera
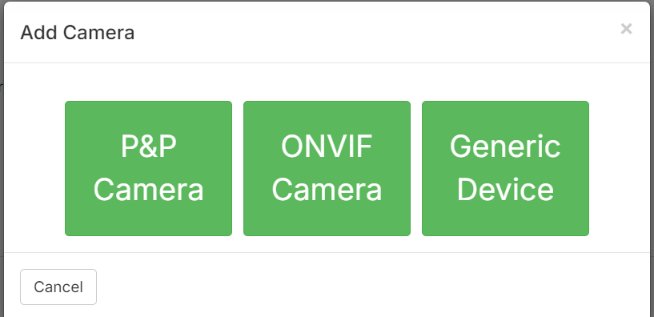
A window asks how to add the camera. Click P&P Camera (plug and play).
- Part 3 · Enter the code
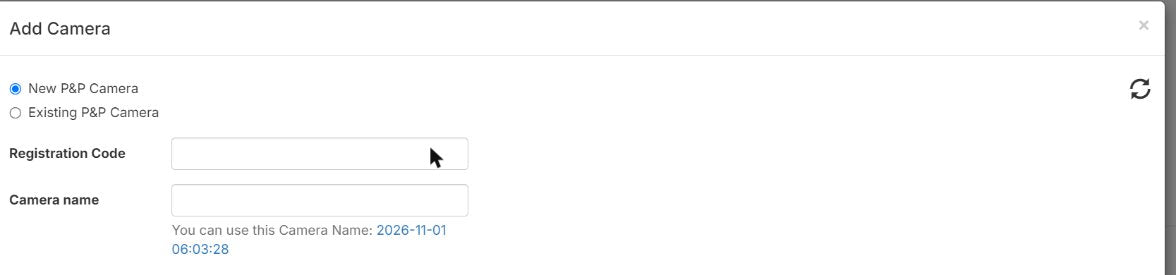
Keep New P&P Camera selected. Paste the camera's Registration Code from Part 2. Give the camera a name you'll know, like Front Door.
- Part 3 · Enter the camera's sign-in
Type the camera's ONVIF user name and password. These belong to the camera, not to your Silarius account. If you're asked to pick a plan, pick the one on your Silarius order. Not sure which? Contact Silarius before you go on.
- Part 3 · Click Create
Click Create. The camera now shows in your camera list. In a minute or two its video status should change to online.
- Part 3 · Repeat for every camera
Do Part 3 again for each camera, each with its own registration code.
- Part 4 · Open the web app
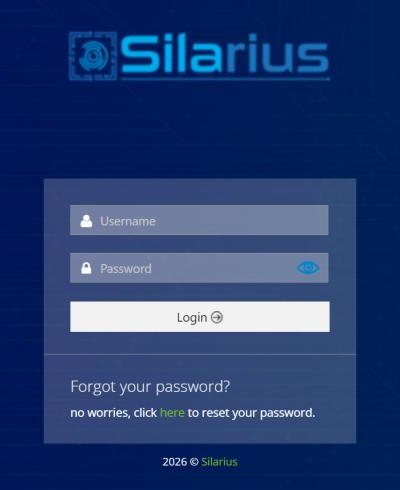
Go to silariussecurity.com/login and click Log in to Silarius Cloud. Sign in with your Silarius Cloud user name and password.
- Part 4 · Find your new cameras
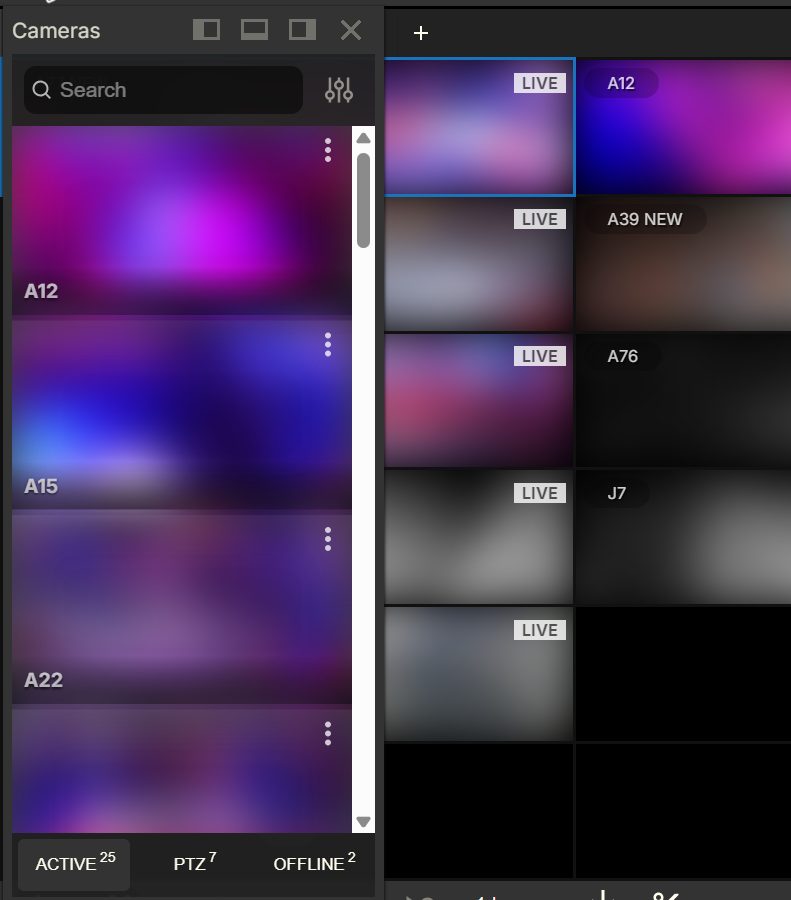
Click the camera icon at the top left to open the Cameras list. Your new cameras are there under Active.
- Part 4 · Put them on your screen
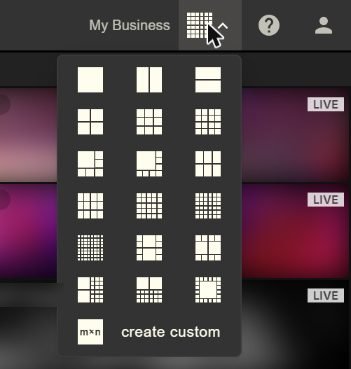
Pick a screen pattern from the grid icon at the top right, then drag each camera from the list into a box. Click a camera to watch it big. See Build a layout to save your screen.
- Part 5 · Check that it records
Wait a few minutes, then click on the timeline at the bottom a little in the past. If you see video, it's recording. You're done!

Good to know
- Leave the Gateway plugged in all the time. If it is off, the cameras behind it can't reach Silarius Cloud.
- Put the Gateway on the same network as the cameras. If your cameras are on more than one network, see One Gateway, many networks.
- Camera shows offline in Part 3? The ONVIF user name or password is usually wrong. Fix it in the camera's settings and try again.
Common questions
Can I add my NVR or DVR through the Gateway?
Yes. Connect the NVR or DVR to the Silarius Gateway, and each camera on it is added on its own. See Connect your NVR or DVR.
Do I need to open ports on my router?
No. The Gateway makes a safe, locked connection out to Silarius Cloud. You don't need port forwarding.
Do Silarius X cameras need the Gateway?
No. Silarius X cameras connect straight to Silarius Cloud. See Add a Silarius X camera.
How many cameras can one Gateway handle?
Up to 50. With very high-quality cameras the real number can be lower, because your internet speed becomes the limit.
Still stuck? We'll do it with you, free.
Silarius customers can get free remote help: sign in, click one button, and a Silarius technician joins your computer.